English
 O'zbek
 Català
 Melayu
 বাংলা
বাংলা Malti
Malti עברית
עברית 한국어
한국어 dansk
dansk Gaeilgenah Éireann
 日本語
日本語 Ελληνικά

Alumiiniumist substraadi protsessi vool
Feb 17, 2022
1. Avamine
Alumiiniumist substraadi tootmisprotsess
1. Materjali - lõikamise protsess
2. Avamise eesmärk
Lõika suures{0}}suuruses sissetulevad materjalid tootmiseks vajaliku suuruseni
3. Ettevaatusabinõud materjalide avamisel
① Check the size of the first piece after cutting
② Pay attention to the scratches on the aluminum surface and the scratches on the copper surface
③ Pay attention to the layering and draping of the edge of the board
2. Puurimine
1. Puurimisprotsess
Tüübel - Puurimine - Kontrollikoda
2. Puurimise eesmärk
Plaadi positsioneerimine ja puurimine, et hõlbustada järgnevat tootmisprotsessi ja kliendi kokkupanekut
3. Ettevaatusabinõud puurimisel
① Check the number of drilled holes and the size of the holes
② Avoid scratches on the sheet
③ Check the drape of the aluminum surface and the deviation of the hole position
④ Check and replace the drill bit in time
⑤ Drilling is divided into two stages, one drilling: after cutting the material, the drilling is a peripheral tool hole
Teine puur: tööriista auk seadmes pärast jootemaski
3. Kuiva/märja filmi pildistamine
1. Kuiva/märja filmi pildistamise protsess
Lihvimisplaadi - film - säritus - arendus
2. Kuiva/märja filmiga pildistamise eesmärk
Vooluahela tegemiseks vajalikud osad renderdatakse lehel
3. Ettevaatusabinõud kuiva/märja filmiga pildistamiseks
① Check whether there is an open circuit in the circuit after developing
② Whether there is any deviation in the development alignment to prevent the occurrence of dry film breakage
③ Pay attention to the defective circuit caused by scratches on the board surface
④ There should be no air residue during exposure to prevent poor exposure
⑤ After exposure, keep it still for more than 15 minutes before developing
4. Happeline/aluseline söövitus
1. Happe/aluseline söövitusprotsess
Söövitus - eemaldamine - kuivatamine - kontrolllaud
2. Happe/aluse söövitamise eesmärk
Pärast kuiva/märja kile pildistamist hoidke vooluringi vajalik osa alles, eemaldage liigne osa väljaspool vooluringi ja pöörake tähelepanu alumiiniumsubstraadi korrosioonile söövituslahuse poolt happesöövitamise ajal;
3. Ettevaatusabinõud happelise/aluselise söövitamise korral
① Note that the etching is not clean and the etching is excessive
② Pay attention to line width and line thickness
③ The copper surface is not allowed to be oxidized or scratched
④ The dry film should be removed cleanly
Viis, siidist jootemask, tegelased
1. Siiditrükk jootmask, iseloomu protsess
Siiditrükk - Eelküpsetamine - Säritus - Arendus - Tegelased
2. Eesmärk siiditrüki joote mask ja tähemärki
① Anti-soldering: protect the circuit that does not need to be soldered and prevent the tin from entering and causing a short circuit
② Characters: play the role of marking
3. Tähelepanu vajavad asjad siiditrüki jootemaski ja tegelaste jaoks
① To check whether there is garbage or foreign matter on the board
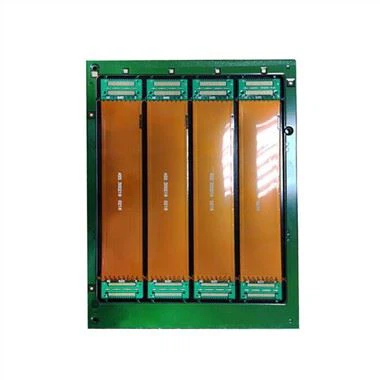
COB alumiiniumist aluspind
COB alumiiniumist aluspind
② Check the cleanliness of the stencil ③ Pre-bake for more than 30 minutes after screen printing to avoid bubbles in the lines
④ Pay attention to the thickness and uniformity of the silk screen
⑤ After pre-baking, the board should be completely cooled to avoid sticking to the film or destroying the gloss of the ink surface.
⑥ Place the ink face down during development
6. V-LÕIK, gongilaud
1. V-LÕIK, gongilaua protsess
V-CUT——Gong board——Tear off protective film——Remove Pifeng
2, V-LÕIK, gongilaua eesmärk
① V-CUT: Connect a single PCS line to the whole PNL plate cutting and leave a small part for easy packaging and removal.
② gong board: remove the excess part of the circuit board
3. Ettevaatusabinõud V-CUT-i ja gongilaua jaoks
① During the V-CUT process, pay attention to the size of V, incomplete edges and burrs
② Pay attention to burrs when the gong board is used, and the gong knife is skewed. Check and replace the gong knife in time.
③ Finally, avoid scratches on the board when removing the front.
Seitse, test, OSP
1. Test, OSP protsess
Line Test - Vastupidavus pingetest - OSP
2. Testimine, OSP eesmärk
① Line test: check whether the completed line is working normally
② Withstand voltage test: check whether the completed line can withstand the specified voltage environment
③ OSP: Make the circuit better for soldering
3, testimine, OSP ettevaatusabinõud
① How to distinguish between qualified and unqualified products after testing
② Placement after finishing OSP
③ Avoid line damage
Kaheksa, FQC, FQA, pakendamine, saatmine
1. Protsess
FQC - FQA - Pakkimine - Saadetis
2. Eesmärk
① FQC conducts full inspection and confirmation of the product
② FQA random inspection and verification
③ Pack and ship to customers as required
3. Pöörake tähelepanu
① FQC pays attention to the confirmation of appearance during the visual inspection process and makes a reasonable distinction
② FQA really conducts random inspections to verify the inspection standards of FQC
③ To confirm the number of packages, avoid mixed boards, wrong boards and package damage 3